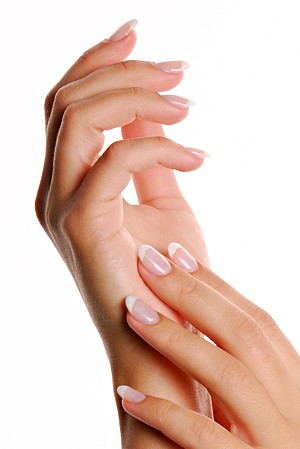
In this simple article we explain How to Do a Professional Manicure at Home, what you need and what you do so you can give your hardworking hands a treat!
If you are looking for ways to avoid the hassle of scheduling and travelling to a salon or just want to save some money, you can do a professional manicure at home. When you have everything you need organized and know exactly what you need to do for salon perfect results, you’ll find that doing your nails at home can be a great way to pamper yourself. And you’ll save enough money to not only stock up on the best nail supplies, but also indulge in some new outfits and a bit of bling. Plus, you’ll never hear that the most convenient time for you has been taken by someone else or find yourself searching for parking.
Now, doing your manicure at home does not mean skimping on the pampering! Before we get to the step by step instructions for exactly how to do a professional manicure at home, let’s talk about your home salon. You’ll want a stable, flat surface to work on whether it is a desk or kitchen table, and you need good lighting. If your spot of choice is lacking light, move a lamp over to work under. Good lighting is a must, especially if you are using nail art pens. Clear away any clutter. Looking at a pile of utility bills or dishes to wash will not give you that pampered feeling! At your favourite salon, you are probably offered tea or coffee. At your salon, you can go one better. Get yourself a healthy, delicious fruit smoothie. Pop in a straw and position it strategically on your work space, and you can enjoy it without using your hands to touch it while your polish is wet.
The night before your home manicure, remove any old polish and wash your hands. Generously apply nail and cuticle conditioning oil. Your nails need a break and a treat as much as you do, so treat them right to keep them looking great. Why stop there? Go ahead and give your hands an intensive moisturizing treatment too. Gorgeous glossy nails do not deserve to be paired with dry, cracked skin.
 Get Ready to Do Your Home Manicure
When it is the day for your manicure, set aside a good block of time where you won’t be interrupted and get your work space prepared. Make sure you have everything you need at your fingertips.
What You Need:
- Nail file
- Cuticle stick
- Alcohol wipes
- Small basin of warm water
- Base coat
- Nail polish
- Top coat
- Nail art pens if desired
- UV or LED nail lamp for drying
- Tissues or cotton buds for any smudges
- Your fruit smoothie and lamp (if needed)
Step by Step Instructions for Your Home Manicure
Ready? Let’s go.
- Wash and dry your hands and use some hand sterilizing fluid to clean them thoroughly.
- File your nails to the shape you desire. Then use an alcohol wipe to remove any filing dust.
- Soak your hands in warm water, and then gently push back your cuticles with your cuticle stick.
- When your hands and nails are dry, apply your base coat with smooth strokes from base to tip. Let this coat air dry for a few minutes.
- Apply your colour. Be sure you don’t have too much polish on the brush and avoid going to the very edge of the base or sides of your nail. Do brush the polish all the way to the edge of the tip. If you are using regular nail varnish, apply two coats. If you are using shellac, one coat will do, but remember that it should stay a millimetre or two inside the edge of the base coat. Dry completely before applying the top coat.
- Your top coat protects your manicure, so take the time to do it properly. Apply the top coat from the cuticle edge to the tip using slow, even strokes.
- Use your nail lamp to dry your nails and spare yourself the boredom of waiting and trying not to use your hands. Follow the manufacturer’s instructions exactly. If you are not using nail art pens, congratulations you are now done. If you want to add a design with nail art pens, continue with the next step.
- It’s best to pick a design in advance for your nail art. Once your top coat is dry, you can start getting creative with your nail pens. Use the striping brush and pen tip to create whatever you feel inspired to do. Have fun with it.
- Apply a second top coat over your nail art designs to protect them, and then dry your nails again with your nail lamp.
Now you and your gorgeous nails are ready to go! Hopefully you also feel pampered and relaxed as well as beautiful.
A Word about Nail Lamps
You will notice that you have two main options for your nail drying lamp. While the differences between the two are minor, they do have differences that should be considered before purchasing. UV nail lamps are usually slightly less expensive, but many feel that the slightly higher price of the LED nail lamp is well worth it. For one thing, you don’t have to replace the bulbs in a LED lamp whereas you do in a UV one, so over time that offsets the price difference. More importantly, LED lamps have a lower cost to the environment because they use less energy, which also means they are very slightly cheaper to use. They are also safer because you don’t have as much UV exposure as you do with a UV lamp. But what really seals the deal for many women is that they LED lamp dries the nails faster. You’ll spend about 30 seconds with a LED lamp compared to two minutes with a UV model.
When you take it step by step, doing your nails at home is not that difficult. If you are worried about your skills, remember that practice makes perfect. Mastering the art of doing a professional manicure at home means you can save time and money while enjoying some papering time on your own schedule.