
Whether you are avidly following the FA Cup finals or cheering for the kids at their GAA match, you can show your support for your favourite teams and sports by doing your shellac nails at home with the team colours. Shellac nails won’t last the whole season, but they will stay glossy and gorgeous for two whole weeks, even if you are out on the pitch playing yourself instead of watching from the comfort of the couch.
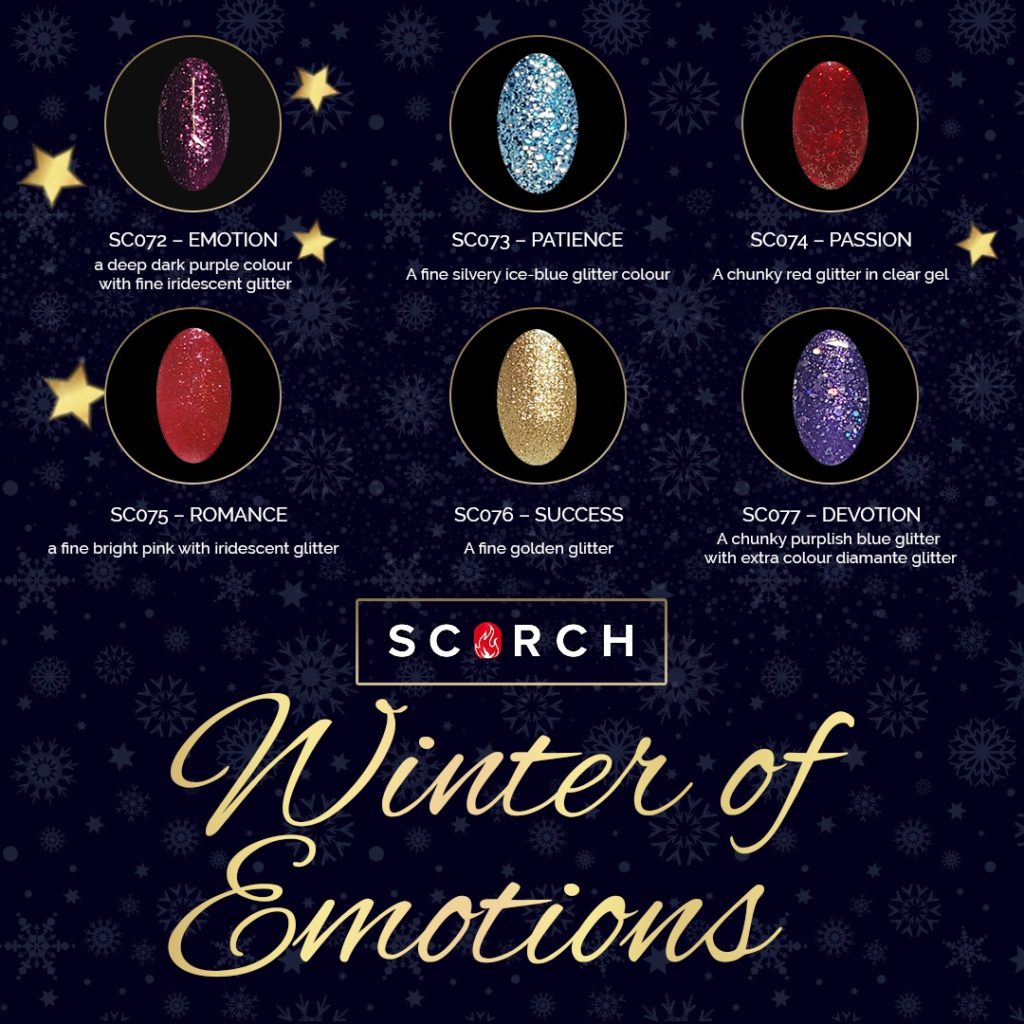
When you are ordering your gel nail polish, take a moment to look for the colours of your favourite teams and your county too. Don’t forget the club where your children or your nieces and nephews play. They will only be delighted when they see your shellac nails done for their big matches. And if you are a carefree singleton who fancies a particular local player or fan, this is an excellent ice breaker if you happen to meet.
How to Do Sporty Shellac Nails at Home
You don’t have to be an expert at doing shellac nails at home to do this. If you know how to do gel nails at home step by step but aren’t confident of your nail art skills, you can still use your shellac nails to show support for your favourite teams. If you want to keep it really simple, you can just do the two colours on alternating nails rather than worrying about using two shades of gel nail polish on the same nail.
You can, of course, use two shades of gel nail polish on each nail without making it very complicated. You don’t need to hand draw the team logo freehand on each nail to show your colours. You can do half of each nail in each colour, or you can make it even easier to do step by step gel nails by first doing each nail in one of the colours and curing that coat before adding a simple stripe of the other colour gel nail polish down the middle. Another easy but fancier looking option for your team colours gel nails is to do your nails in their main colour, and do the tips only in the other colour. Don’t apply the top coat until you have finished and cured each coat of the colour.
If you are pretty savvy with your gel nails kit, you can get more creative. You can use one colour gel nail polish to cover your nails and then add creative polka dots, zig zag lines or any other pattern or design you want to create. The fun part about doing shellac nails at home is that once you become skilled at it, you can do whatever you want. Your imagination is the only limit on what sort of design you can create. If you support Mayo, Louth, Cork, Laois or Sligo, for example, you can spell out the county by doing one letter on each nail.
Playing Sport and Wearing Gel Nail Polish
While a lot of people associate gel nail polish art with long nails and a generally high maintenance appearance, in reality, a gel nail kit fits perfectly into an active, sporty lifestyle. Think about it. When you do your gel nails at home, you are applying a tough, durable gel nail polish that lasts for a couple of weeks without chipping or scratching. Gel nail polish can take the wear and tear of an active life. That is one of the best things about it.
And you don’t actually need long nails to enjoy shellac nails. Take a good look at some celebrity hands; you’ll see more and more shorter, more practical nails with stunning nail art. It is true that shorter nails don’t have the room for more elaborate designs, but if you prefer to keep your nails short, you don’t have to miss out on the fashion and fun of the latest gel nails trends. Short nails are rounder, so they are a better shape to decorate as tennis balls or footballs anyway.
For a lot of us, playing sport is even more fun than watching our favourite teams. There are plenty of other fun, healthy activities that ruined old fashioned nail varnish. Now you can garden, go camping or glamping, play sport, make pottery and do whatever you enjoy without worrying about chipping a nail. It’s not all fun in life, however, and work can take a toll on regular nail varnish. If you’re doing long hours at a keyboard or a cash register, all that tapping won’t damage your gel nails one bit. Whatever work you do with your hands, for fun or for work, won’t prevent you from having great nails whatever length you prefer them if you learn how to do gel nails at home step by step.
Quick and Easy Step by Step Gel Nails
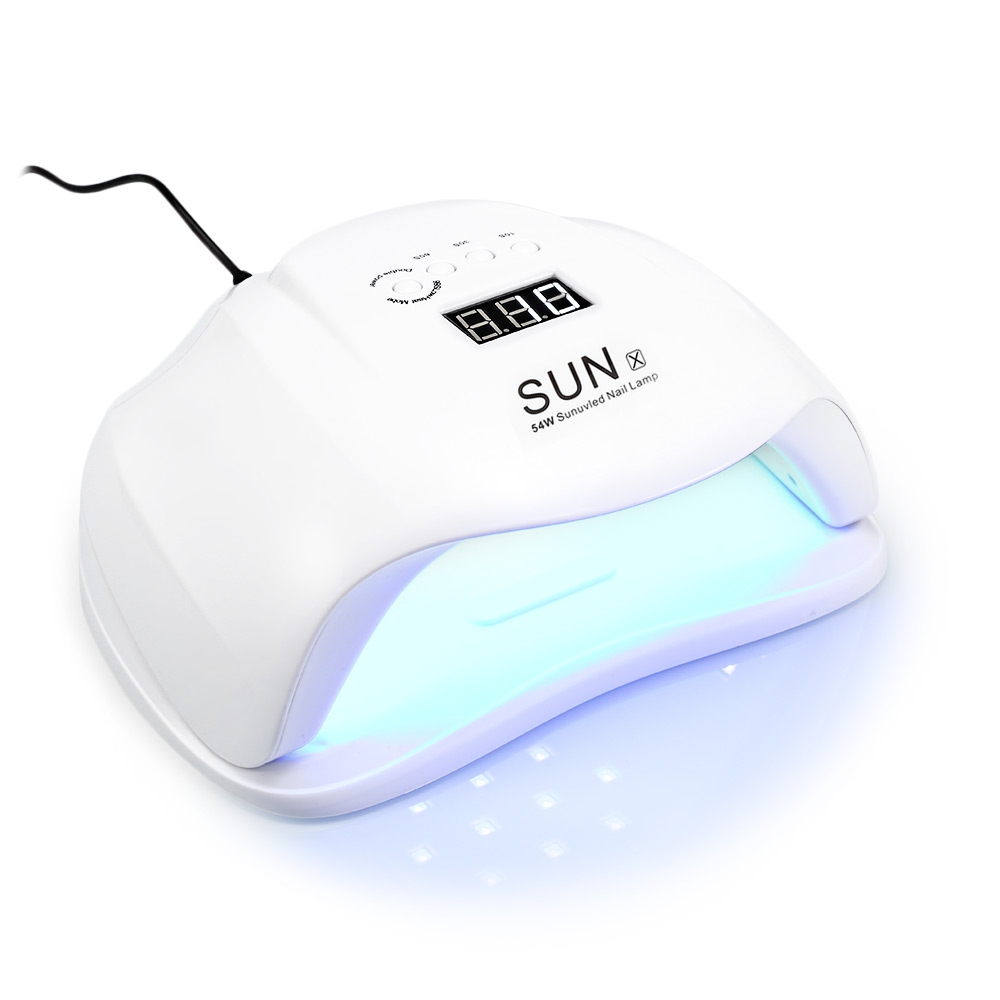
If you’re a busy woman juggling family and work while watching for a chance to enjoy watching or playing your favourite sports, stunning nails might seem like more than your schedule can bear. Happily the opposite is true. When you learn how to do gel nails at home step by step, you’ll spend much less time on them than you would if you went to the salon or used regular nail varnish. Because it uses a LED or UV nail lamp, which will be included in any decent gel nail kit, to cure the gel nail polish, you aren’t waiting around for wet varnish to dry. Also, you won’t need to touch them up or redo them for two weeks. Here’s the quick version of how to do gel nails at home:
1. Prepare your nails as you would for any other polish.
2. Apply the base coat brushing out from the cuticle over the edge of the nail.
3. Use the nail lamp from your gel nail kit to cure that coat.
4. Apply one coat of colour leaving a small uncoloured strip around the edges and cure.
5. Repeat for second coat.
6. Add your second colour for stripes, polka dots or whatever design you want. Cure again.
7. Apply top coat as you did base coat so that the colour coats are completely sealed between the base and top coats. Cure completely and you’re done!
When you have your own gel nail kit and know how to do gel nails at home, it is quick and easy to have durable designs celebrating your favourite sports and teams. That’s something to cheer about!